In this guide, I’m going to walk you through how to craft new contact information using the form submission API in the impressive HubSpot platform. There’s no better way to round up vital UTM factors within HubSpot’s contact features, and enhance your marketing campaign tracking. Instead of leaning solely on the contacts API, the form submission API allows you to integrate UTM parameters straight into your contact data faultlessly. For this journey, we’re calling in a special agent – Postman – that’s known widely for its expertise in API testing, married with a token generated through HubSpot’s private apps and a HubSpot form.
Creating contacts via form submissions is a powerful method that not only captures valued user details but also eases UTM parameters integration. UTM parameters are your best friends when it comes to tracking how successful your marketing campaigns are and learning about user engagement and behavior.
Setting Up a Private App #
First thing’s first – we have to breathe life into a private app in HubSpot, which will arm you with the necessary authorization token.
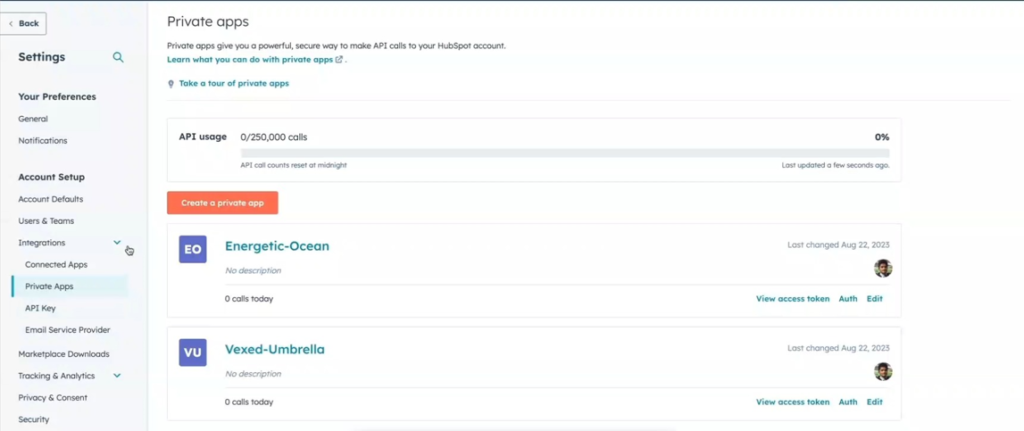
- Login to HubSpot: Use the web portal to access your HubSpot account.
- Navigate to Settings: Visit the main dashboard, spot the “Settings” tab, and give it a click.
- Private Apps Section: Inside the settings, you’ll find the “Private Apps” section. Head there next.
- Create a New App: Create a fresh private app and be sure to designate the relevant scopes. Don’t forget to include the “forms” scope for this guide – it’s vital to the form-related functionality.
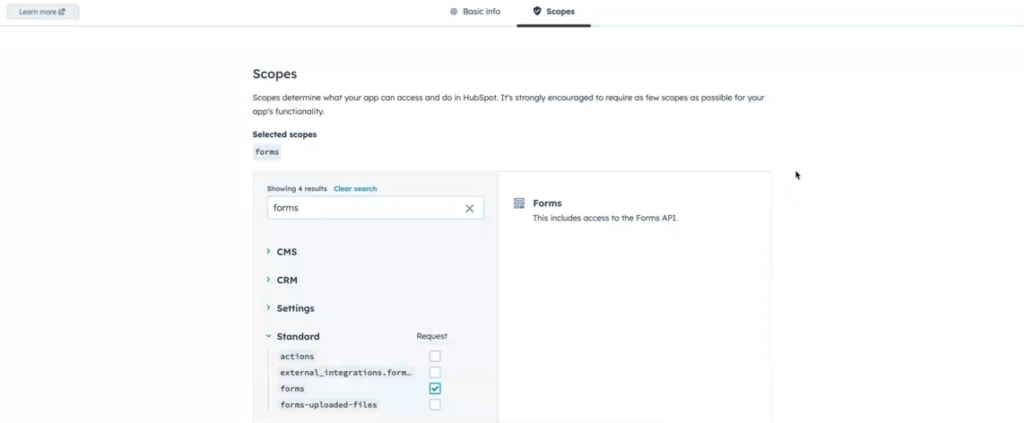
- Save the App Configuration: After putting everything in place, make sure you save your changes.
Obtaining the Authorization Token #
With the private app up and running, it’s time to secure the authorization token, the key ingredient for your API requests.
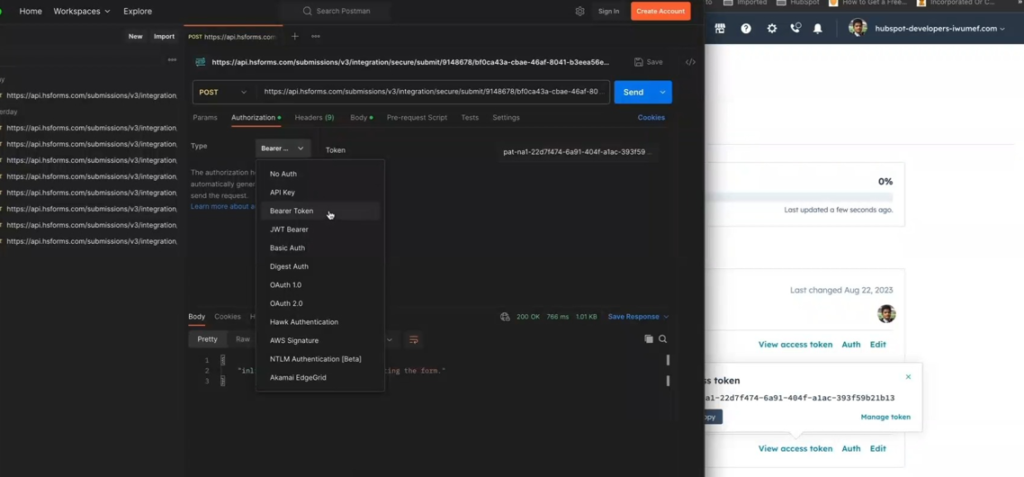
- Access Private App Settings: Visit the “Private Apps” section and find your newly birthed private app.
- Retrieve the Token: Inside the app settings, locate and copy the authorization token. This token will be your key for all API requests.
Collecting HubSpot Portal ID and Form ID #
Before launching your API requests, you’ve got to snag your HubSpot portal ID and the form ID tied to the form you want to use.
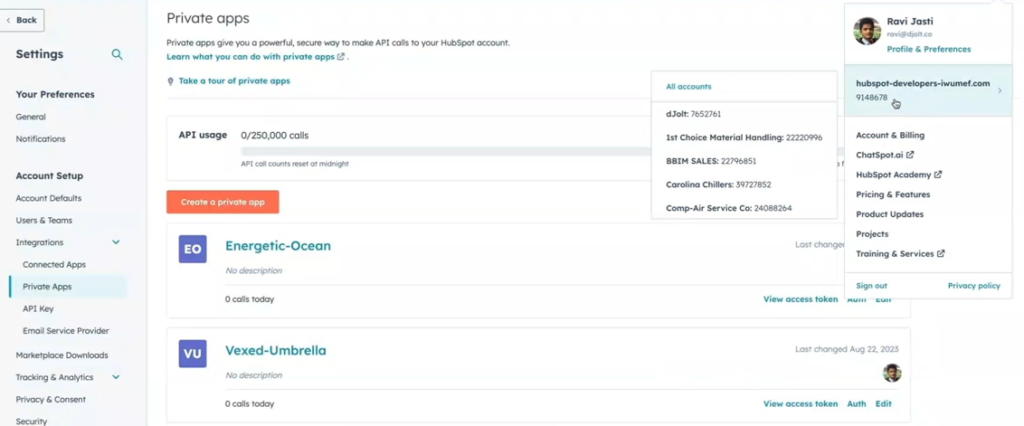
- HubSpot Portal ID: Hit your profile icon in the top-right hand corner of the HubSpot interface. This will reveal your HubSpot portal ID, which is absolutely vital for connecting your API requests to your specific HubSpot account.
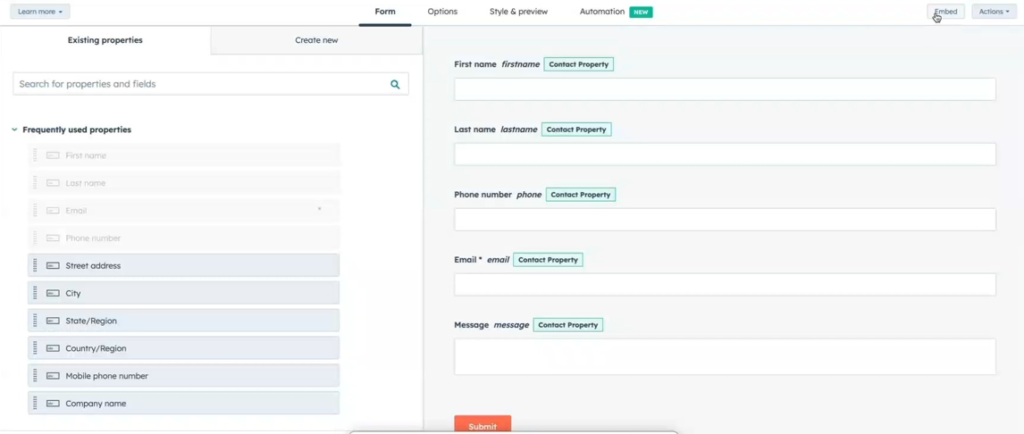
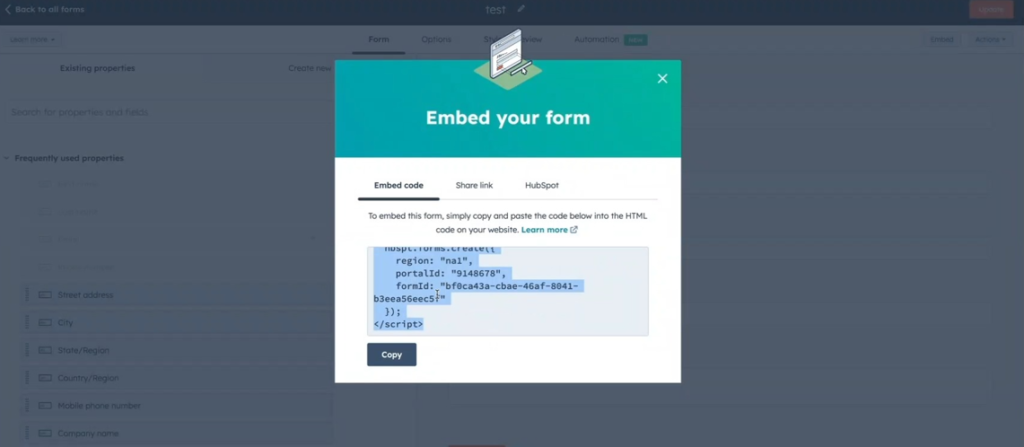
- Form ID Discovery: You’re going to need to put together a HubSpot form that includes the necessary fields (like first name, last name, email, message). You’ll be able to find the form ID within the embed code section inside the form’s settings. Or, you can spot the form ID from the URL.
Constructing the API Request #
Equipped with all our required info, let’s put together our API request using your new best friend, Postman.
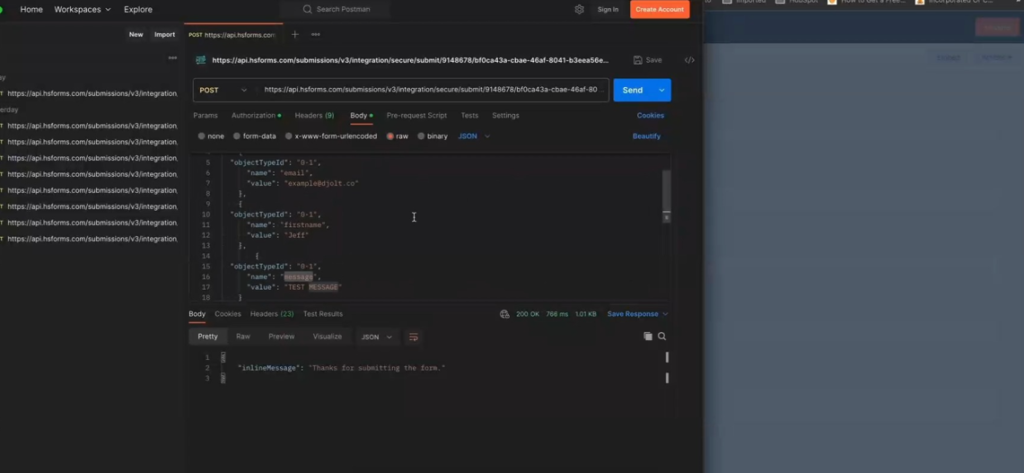
- Launch Postman: Open up the trusty Postman application, which offers an incredibly user-friendly space for designing and sending your API requests.
- Choose Request Type: Choose POST as your HTTP request type so you can send over the data.
- API Endpoint URL: Put together this URL by integrating your HubSpot portal ID and form ID.
- Request Body: Make up the request body to contain all of the essential information, including your email, first name, message, HubSpot token, and Page Uri (the URL that houses your UTM parameters).
Integrating UTM Parameters #
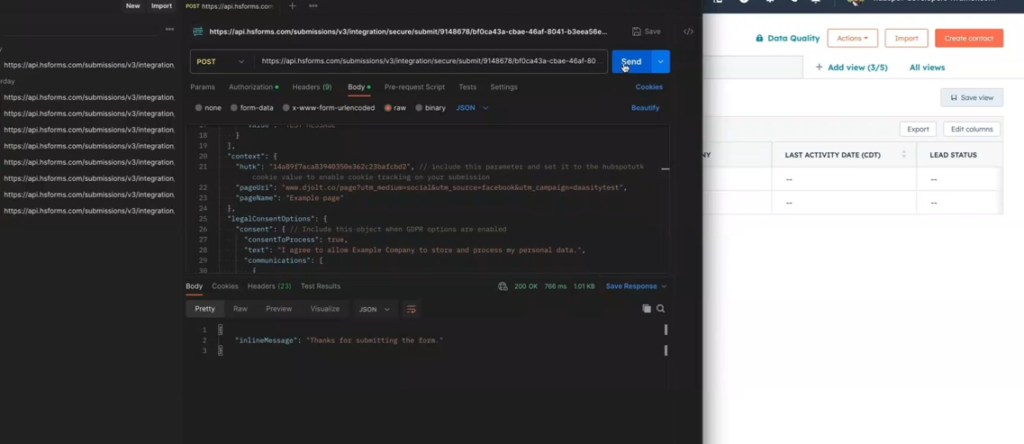
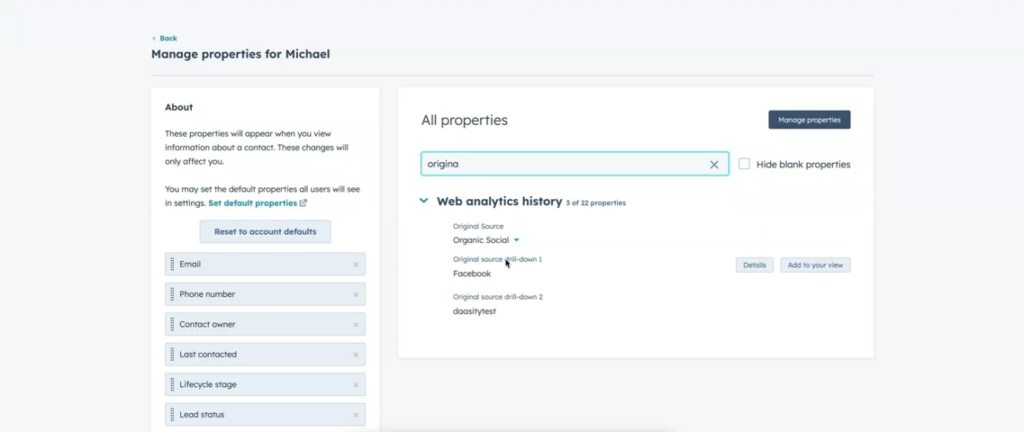
Within the Page Uri field, you’re going to want to integrate UTM parameters to decipher where your contact submission is coming from.
- UTM Medium: This is where you outline the method of the marketing campaign, e.g., “Social.”
- UTM Source: This is where you name the origin of the campaign, e.g., “Facebook.”
- UTM Campaign: Here, you should attach a campaign name, e.g., “Test.”
Now, fire off the API request by hitting the “Send” button within your Postman platform. This will send the gathered data and parameters over to the servers at HubSpot.
Verifying Contact Creation #
When the API request has landed successfully, you’ll receive a response that confirms the form submission has been received.
- Check the Contact Database: Make your way to the contacts page on HubSpot and give it a refresh. You’ll be checking to see if your new contact was added successfully.
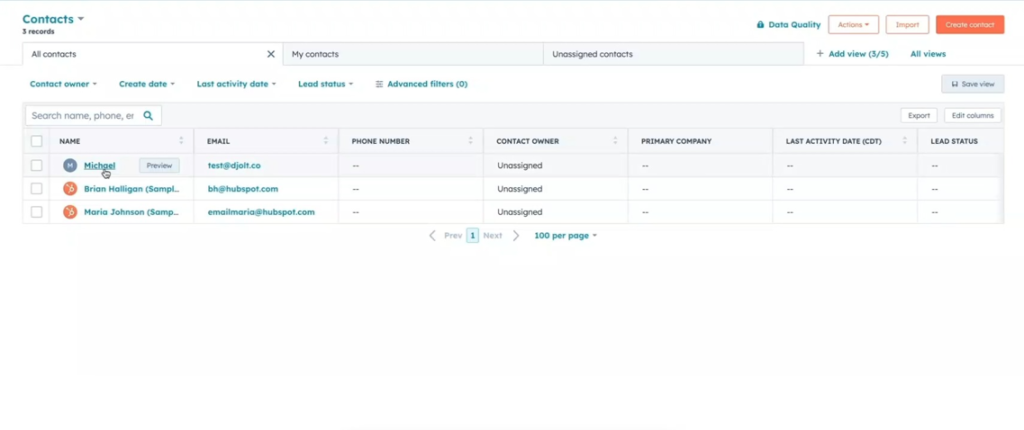
- Inspect New Contact Info: Make sure you review the newly added contact’s details in the HubSpot interface, paying keen attention to the embedded UTM parameters and the specifics of where the contact originated.
Conclusion #
Using the form submission API in HubSpot gives you a fantastic, efficient method for gathering contact information and concurrently integrating vital UTM parameters. This approach doesn’t just streamline campaign tracking processes, it also gives you great insight into user engagement. By setting up the key elements and following the steps outlined here, you can seamlessly create contact records, allocate them to specific marketing campaigns, and enhance your marketing analytics and decision-making capabilities. So, roll up your sleeves and get started!


